WebGL 작동 방식
GPU의 그래픽 처리는 기본적으로 두 부분으로 이루어집니다.
- 정점 위치 값 등을 클립 공간으로 변환
- 1의 일부를 기준으로 픽셀 채우기
이 프로세스를 호출하는 webgl 함수가 있습니다. gl.drawArray(type, offset, count) 입니다.
우리가 설정한 정점 셰이더(이하 vsh)에 미리 정의되어 있습니다. gl_Position 이름이 지정된 변수에 값을 입력할 때
이 값을 기준으로 실제 캔버스의 클립 영역 위치에 정의합니다.
gl.drayArray에서 유형을 사용하여 GPU가 채울 픽셀을 제한합니다.
예를 들어 gl.TRIANGLES는 삼각형임을 나타냅니다. 따라서 3개의 꼭지점을 만들면 이 3개의 꼭지점이 삼각형을 형성하는지 확인합니다.
각 부분은 픽셀로 그려집니다. 이 픽셀로 그리는 과정 래스터화말하다.
조각 셰이더(이하 fsh)는 채울 색상을 결정하기 위해 채울 각 픽셀에 대해 호출됩니다. 실제로 우리가 채우는 색상 값은 glsl에 미리 정의되어 있습니다. gl_FragColor 색상은 이름이 지정된 변수에 넣어 정의됩니다.
다양한
그렇다면 각 픽셀이 얼마나 많은 정의를 가질지 알 때 해당 색상 값을 어떻게 설정할 수 있습니까?
예, 동일한 삼각형을 단색으로 채울 수 있지만 기본적으로 vsh에서 fsh로 값을 전달할 수 있습니다. 우리가 Varying 고정형으로 변수를 생성하여 삽입하면 fsh에서 정의하여 색상 값을 얻을 수 있습니다.
Varyingfsh에서 래스터화하는 경우 주어진 정점에 대해 정의된 값입니다. 보간각 픽셀의 값을 변환하고 로드합니다.
예를 들어, 다음과 같은 경우 캔버스에 정의된 위치 값에 따라 각 픽셀의 모든 색상이 변경됩니다.
모든 픽셀 값은 꼭짓점 수로 정의되는 다양한 값을 갖지만 실제 값은 픽셀 수에 해당합니다. 그래서 “Vary”를 선택했습니다.
varying vec4 v_color;

void main() {
    // ...
    v_color = gl_Position * 0.5 + 0.5;
}
varying vec4 v_color;
void main() {
//...
gl_FragColor = v_color;
}위의 예에서 픽셀의 색상이 위치 값에 따라 달라지는 경우 정점 기반 완전히 새로운 수준으로 변화를 가져올 수도 있습니다.
버퍼를 통해 새 속성 값을 추가하고 해당 값을 vary에 할당하면 어떻게 될까요?
attribute vec2 a_position;
attribute vec4 a_color;
varying vec4 v_color;
void main() {
// ...
// 속성에서 베링으로 색상 복사
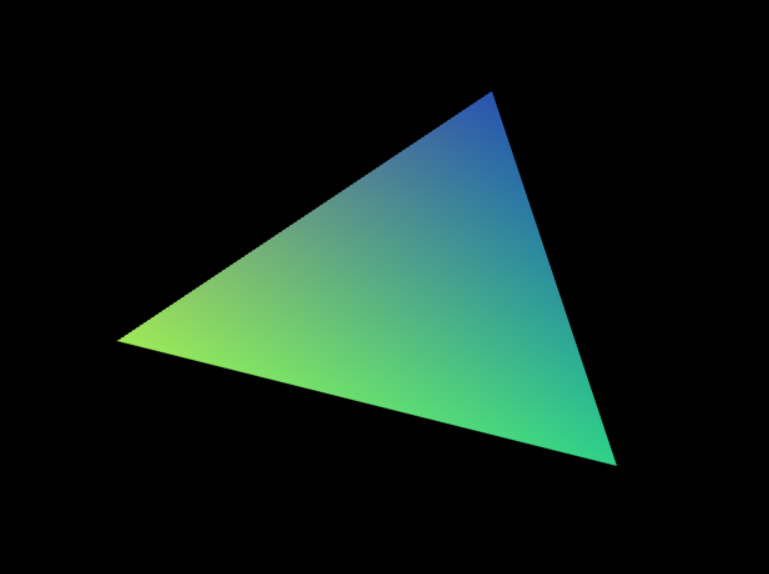
v_color = a_color;
}색상 강도는 세 가지 색상 값과 각 정점에 대해 정의된 위치에 따라 보간됩니다. (위의 예시 사진)
위에서 설명한 이미지 예시는 아래의 샘플 코드를 참고하시면 도움이 될 것입니다.
import { createProgram, createShader } from "./webglutility";

const vsh = `
attribute vec2 position;
attribute vec4 color;
uniform vec2 resolutionPosition;

varying vec4 v_color;

void main() {
    vec2 positionRatio = position / resolutionPosition;
    vec2 biasedPositionRatio = 2.0 * positionRatio;
    vec2 clipSpacePosition = biasedPositionRatio - 1.0;

    gl_Position = vec4(clipSpacePosition, 0, 1);
    v_color = color;
}
`;

const fsh = `
precision mediump float;

varying vec4 v_color;

void main(){
    gl_FragColor = v_color;
}
`;

(function main() {
    const gl = document.querySelector("#glcanvas")?.getContext("webgl");
    if (!gl) {
        alert("no canvas in page");
        return;
    }

    const program = createProgram(
        gl,
        createShader(gl, vsh, gl.VERTEX_SHADER),
        createShader(gl, fsh, gl.FRAGMENT_SHADER)
    );

    if (!program) {
        console.error("program compiling error");
        return null;
    }

    drawClipSpace(gl, program);
    console.log("finished job successfully");
    return 0;
})();

function drawClipSpace(gl, program) {
    const position = gl.getAttribLocation(program, "position");
    const color = gl.getAttribLocation(program, "color");
    const resolutionPosition = gl.getUniformLocation(program, "resolutionPosition");
    gl.viewport(0, 0, gl.canvas.width, gl.canvas.height);
    // 캔버스 지우기
    gl.clearColor(0, 0, 0, 1);
    gl.clear(gl.COLOR_BUFFER_BIT);

    gl.enableVertexAttribArray(position);
    gl.enableVertexAttribArray(color);

    const positionArr = (
        100.0, 200.0,
        400.0, 400.0,
        500.0, 100.0,
    );
    const colorArr = (
        Math.random(), Math.random(), Math.random(), 1,
        Math.random(), Math.random(), Math.random(), 1,
        Math.random(), Math.random(), Math.random(), 1,
    )

    const positionBuffer = gl.createBuffer();
    gl.bindBuffer(gl.ARRAY_BUFFER, positionBuffer);
    gl.bufferData(
        gl.ARRAY_BUFFER,
        new Float32Array(positionArr),
        gl.STATIC_DRAW
    );

    gl.vertexAttribPointer(
        position,
        2,
        gl.FLOAT,
        0,
        0,
        0
    );
    // set color

    const colorBuffer = gl.createBuffer();
    gl.bindBuffer(gl.ARRAY_BUFFER, colorBuffer);
    gl.bufferData(
        gl.ARRAY_BUFFER,
        new Float32Array(colorArr),
        gl.STATIC_DRAW
    );
    gl.vertexAttribPointer(
        color,
        4,
        gl.FLOAT,
        0,
        0,
        0
    );


    gl.useProgram(program);
    gl.uniform2f(resolutionPosition, gl.canvas.width, gl.canvas.height);

    // draw
    var primitiveType = gl.TRIANGLES;
    var offset = 0;
    var count = 3;
    gl.drawArrays(primitiveType, offset, count);
}
나중에 설명에서 유틸리티 코드를 게시하겠습니다.